Beautifully Braided Cinnamon Buns: An Incredible Ultimate Recipe
Beautifully Braided Cinnamon Buns are not just a delightful pastry; they embody the warmth and comfort of home baking. There’s something magical about waking up to the smell of freshly baked cinnamon buns wafting through the home. Each bun, lovingly crafted and generously filled with the sweet aroma of cinnamon, promises an amazing experience for your taste buds. Their intricate braiding not only adds a unique visual appeal but also makes for an engaging baking process that anyone can enjoy. Whether it’s for a special brunch, a cozy family breakfast, or simply an indulgent treat, these cinnamon buns become the centerpiece of any gathering.
Imagine the first bite of these sweet rolls, with their soft, pillowy texture and rich filling melting in your mouth. They are more than just a treat; they are an experience that creates cherished memories with family and friends. In this guide, you will learn why this recipe has a special place in the hearts of many, how to prepare them step by step, and the best ways to serve your beautifully braided cinnamon buns. Regardless of your baking expertise, you’ll find this recipe approachable and enjoyable. Let’s get started on this journey towards creating these heavenly treats that will make your day feel just a little brighter!
Why You’ll Love This Recipe
The Beautifully Braided Cinnamon Buns offer a multitude of reasons that will make you fall in love with this recipe right from the start. Here are some highlights:
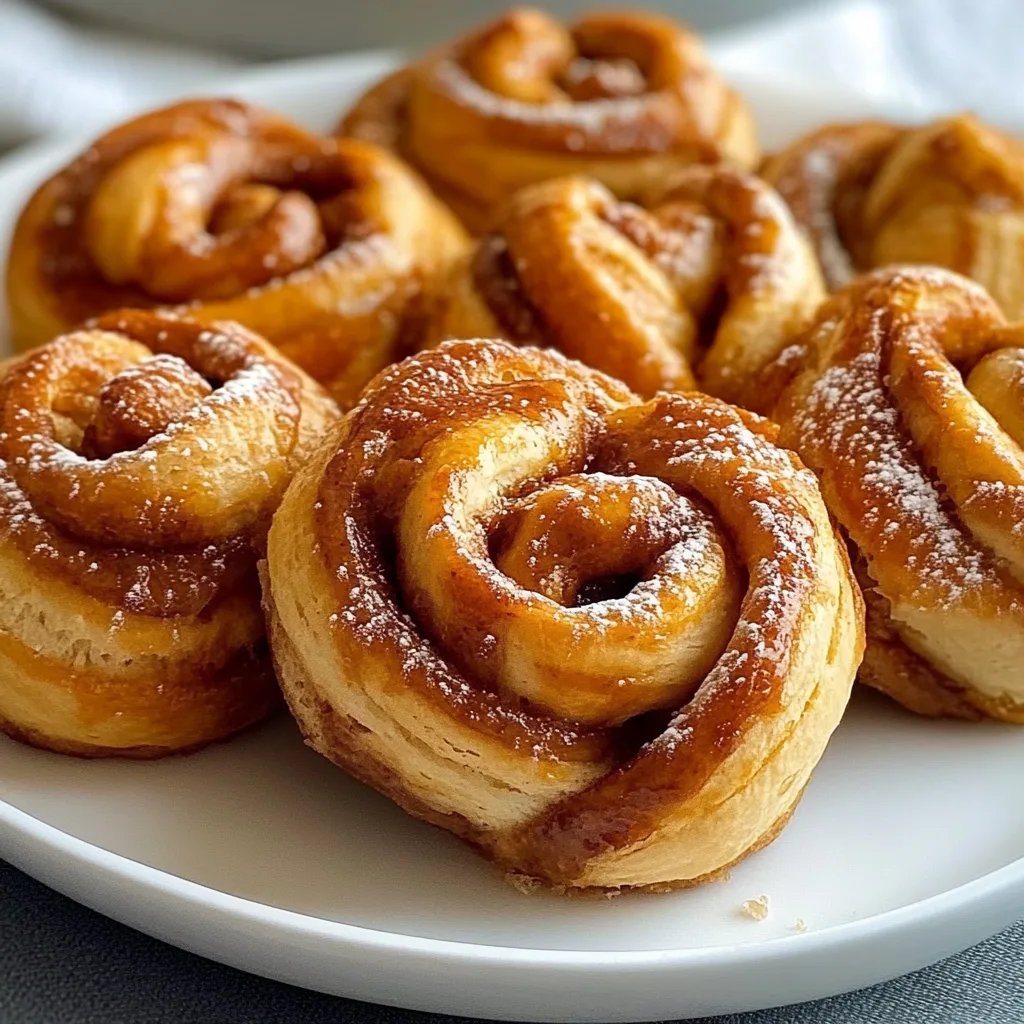
1. Unique Braided Presentation – The gorgeous braid makes these buns visually stunning.
2. Delicious Flavor Profile – The sweet and spicy filling pairs perfectly with the soft dough.
3. Aromatic Experience – The scent of cinnamon while baking is simply irresistible.
4. Perfect for Sharing – They’re ideal for gatherings, enjoyable for both kids and adults.
5. Customizable Fillings – You can easily tweak the filling to suit your preferences, adding nuts or even chocolate.
6. Simple Ingredients – Most ingredients are staples in your pantry, making it easy to whip them up anytime.
7. Engaging Process – The braiding technique makes the baking experience fun and interactive.
With every twist and turn, you’ll discover the delight in creating something that not only looks beautiful but also tastes incredible. This recipe stands out as a must-try for both novice and experienced bakers alike.
Preparation and Cooking Time
The total time to create these Beautifully Braided Cinnamon Buns is approximately 2 hours, which includes preparing the dough, allowing it to rise, and baking. Here’s how the time breaks down:
– Preparation Time: 30 minutes
– Rising Time: 1 hour
– Cooking Time: 25-30 minutes
– Cooling Time: 10-15 minutes
These time frames may vary based on your kitchen setup, but this outline offers a solid estimate to help you organize your baking schedule effectively.
Ingredients
– 4 cups all-purpose flour
– 1 cup whole milk
– 1/2 cup granulated sugar
– 1/2 cup unsalted butter, melted
– 2 large eggs
– 1 packet (2 1/4 tsp) active dry yeast
– 1 teaspoon salt
– 2 teaspoons ground cinnamon
– 1/4 teaspoon ground nutmeg (optional)
– 1/4 cup brown sugar
– Additional melted butter for brushing
– Icing (optional)
Step-by-Step Instructions
Creating Beautifully Braided Cinnamon Buns is an enjoyable and rewarding process. Follow these steps for a successful baking experience:
1. Prepare the Yeast: In a small bowl, warm the milk until it is lukewarm (not hot). Stir in the yeast and a teaspoon of sugar. Let it sit for about 5-10 minutes until foamy.
2. Mix Dry Ingredients: In a large bowl, whisk together the flour, remaining sugar, salt, and spices (cinnamon and nutmeg).
3. Combine Ingredients: In another bowl, combine the melted butter and eggs. Slowly add the yeast mixture, stirring to combine.
4. Mix Dough: Gradually add the wet mixture to the dry ingredients, mixing until a dough forms. If the dough is too sticky, add a little more flour as needed.
5. Knead the Dough: On a floured surface, knead the dough for about 8-10 minutes until it becomes smooth and elastic.
6. First Rise: Place the dough in a greased bowl, cover with a damp cloth, and let it rise in a warm area for about 1 hour, or until doubled in size.
7. Prepare Filling: In a small bowl, mix the brown sugar with additional cinnamon for the filling. Set aside.
8. Roll Out Dough: Once the dough has risen, punch it down and roll it out on a floured surface into a rectangle, approximately 1/4 inch thick.
9. Add Filling: Brush the rolled dough with melted butter. Sprinkle the brown sugar mixture evenly over the dough, leaving approximately a half-inch border around the edges.
10. Cut and Braid: Cut the dough into strips about 2 inches wide. Take two strips and twist them together, forming a braid. Repeat until all strips are braided.
11. Second Rise: Place the braided buns on a baking sheet lined with parchment paper, cover with a cloth, and let them rise for another 30-40 minutes.
12. Preheat Oven: During the second rise, preheat your oven to 350°F (180°C).
13. Bake: Once risen, bake for 25-30 minutes, or until golden brown. Keep an eye on them to prevent overbaking.
14. Cool: Allow the buns to cool on a wire rack for about 10-15 minutes.
15. Optional Icing: If desired, drizzle icing over the warm buns for added sweetness.
By following these steps, you will create an incredibly delightful batch of Beautifully Braided Cinnamon Buns that not only tantalize the senses but also look impressively beautiful!
How to Serve
Presenting your Beautifully Braided Cinnamon Buns can enhance the overall experience. Here are a few suggestions for serving them:
1. Plating: Arrange the buns on a decorative platter for an appealing presentation. Consider garnishing with nuts or a sprinkle of powdered sugar for added flair.
2. Accompaniments: Pair the cinnamon buns with a cup of coffee, hot cocoa, or a glass of milk to complement their sweetness.
3. Sharing Style: For a cozy gathering, consider tearing apart the buns at the table, encouraging everyone to share their love for these delightful pastries.
4. Storage: If you have leftovers, store them in an airtight container. They can also be reheated for a few seconds in the microwave for a warm treat later.
5. Serving Fresh: Ideally, serve the buns warm from the oven for the best flavor and texture. They’re the most enjoyable when they are fresh.
By considering these serving tips, you can elevate the experience of your Beautifully Braided Cinnamon Buns, ensuring that everyone enjoys each delightful morsel. Happy baking!
Additional Tips
– Use Room Temperature Ingredients: Ensure your eggs and milk are at room temperature. This helps create a smoother dough.
– Don’t Skip the Rising Time: Allowing the dough to rise adequately is essential for achieving a light and fluffy texture. Patience pays off!
– Experiment with Spices: Try adding cardamom or ginger to the filling for a unique twist.
– Brush with Egg Wash: For an enhanced golden color, brush the tops of the buns with an egg wash before baking.
Recipe Variation
Feel free to get creative with your beautifully braided cinnamon buns! Here are a few variations to consider:
1. Nutty Addition: Incorporate chopped walnuts or pecans into the cinnamon filling for a delightful crunch.
2. Chocolate Lovers: Add chocolate chips to the filling or drizzle melted chocolate on top for an indulgent treat.
3. Fruit Infusion: Layer in some grated apples or dried fruits like raisins or cranberries for a fruity kick.
4. Frosting Twist: Replace traditional icing with cream cheese frosting for a deliciously tangy variation.
Freezing and Storage
– Storage: Place any leftover cinnamon buns in an airtight container. They can be stored at room temperature for 2-3 days.
– Freezing: If you want to freeze them, wrap the cooled buns in plastic wrap and then in aluminum foil. They can be frozen for up to 3 months. Reheat gently in the oven to enjoy them warm.
Special Equipment
To create the perfect beautifully braided cinnamon buns, here’s a list of essential tools you should have on hand:
– Large mixing bowl
– Whisk
– Rolling pin
– Baking sheet
– Parchment paper
– Dough scraper (optional for easy handling)
– Wire rack for cooling
Frequently Asked Questions
Can I use whole wheat flour?
Yes, you can substitute part or all of the all-purpose flour with whole wheat flour. Just note the texture may differ slightly.
What should I do if my dough doesn’t rise?
Make sure your yeast is fresh and the milk isn’t too hot or cold. If it’s still not rising, your kitchen might be too cold; consider finding a warmer spot.
How can I tell if my cinnamon buns are done baking?
They should be golden brown on top, and when you tap the bottom, it should sound hollow. A toothpick inserted into the center should come out clean.
Can I make the dough ahead of time?
Absolutely! You can prepare the dough and refrigerate it overnight. Let it come to room temperature before shaping and braiding.
What pairs well with cinnamon buns?
These buns are delightful with a cup of coffee or tea. You can also serve them alongside fresh fruits or yogurt for a balanced breakfast.
Conclusion
Beautifully Braided Cinnamon Buns are more than just a pastry; they’re a delightful experience that brings joy to any occasion. The process of creating these buns can be therapeutic, making the end result even more satisfying. Whether you are baking for a special event or simply indulging at home, these cinnamon buns will certainly impress your family and friends. Enjoy the delightful flavors and the beautiful presentation, as every bite takes you on a journey of warmth and comfort. Happy baking!